Funkinchan:Tutorial
Hi, in this short tutorial, we will teach you about how to create a mod page for the Funkinchan. Let's start
Step 1: Create Source
To begin with, you must create the URL source from which the page will be hosted on. To perform this, you can do the following:
- Manually type the page in your browser URL. For example, if your mod is named Lol, the url must be funkinchan.fun/index.php/Lol
- Search for your page name on the search bar function
Once there, you will find a red link, clicking it will allow you to go to create the page.
Step 2: Start Editing
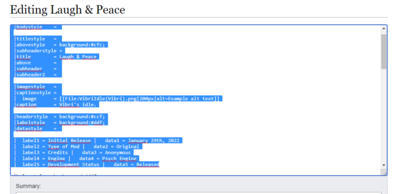
Now that you are in the editor, you can begin writing the code that your mod page will use, and contain the relevant info about it. Which you can write either the hard way manually, or more easily, by just copying the code from another page.
To do that, first, without closing the create page tab, go to any mod page with the necessary templates you want to use for your mod, and then click on the edit source button atop the page.
Once there, do not change anything, just use Ctrl+A to copy all the information in the textbox (or just the relevant parts), and then press Ctrl+C to copy it.
Back at your create page tab, press Ctrl+V to paste all the information into your own page.
Step 3: Change the Code
Now that you have pasted the necessary code to create a page, the next step is to change all the relevant info from the other mod, to the mod are writing about, saving only the overall template structures, and removing what you are not going to use. To add any additional paragraphs, galleries or tabs you need, just copy the template code again.
Additionally, regarding file boxes, you must replace the name of the previous files, with the filenames of your uploaded files in order for them to show up (Check Step 4 first)
Step 4: Upload your Files
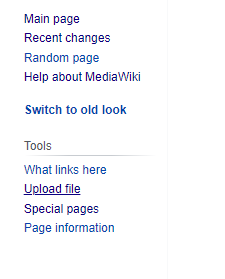
Now that you have made your page code, it's time to add the files for your page, in order to do that, first go to the sidebar on the left side of your screen, and click on the upload files link to go the uploading page, but without closing the create source page.
Once there, you must click the select file button to upload a file, upon which, navigate through your folders to select the files you want to upload. In the file description box, you must write the filename that your file will use within the wiki, so better name them in an logical fashion, preferably using a ( ) to name them according to the mod page they belong, in addition that they must correspond to the code you used in your page. Once you are finished with it, just click the upload file button.
Step 5: Finishing Editing
With your page files all uploaded it's time to finish the page. Go back to the create source page, and add all the missing details and info, before saving however, remember to use the show preview button to check on the changes you made, if in the preview page something appears broken, you must go back to your code to fix it.
Once everything is in order, just click the Save Page button to create your page and see your creation, if during the process something broke or you wanted to add more, don't worry, just click on the edit source button, to go back to the source box and fix everything you missed.
If you have any more questions, just search for Mediawiki tutorials on the internet, or ask one of the admins for help.


